That’s the reason these phones are very smooth as well as fast in performance. But there was a time when the Android smartphones used to come with low internal memory of 250-450 megabytes. Moreover, due to such limited memory, there is always a problem while installing a new app. One way is to delete any of the pre-installed app to carve out some space for a new one. But this method is not so effective. Increasing the internal memory can be the only solution for this. Furthermore, you must have noticed that with the increase in apps the performance and smoothness of any phone decreases. This is because the internal memory of your phone cannot withstand the plenty of loaded apps in it. Furthermore, you can partition your external memory card and use some of its space for internal memory. Besides, different techniques are available for partitioning a memory card. Out of which we have listed some easy and basic six methods. Use any of these methods to increase your phone’s memory. Moreover, methods 1 and 2 are the most widely used techniques as they do not restrict the use of Stock firmware or Custom ROM.
How to Increase Internal Memory of Android Phone
Interested users can proceed to our actual easy and step-by-step article on how to increase the internal memory of any Android phone.
Disclaimer
Proceed at your own risk. we at Droid Thunder will not be responsible for any damage.
Pre-requisites
Your phone must be ROOTED. This is essential for all the mentioned methods. Backup all the contents of the memory card on your computer as everything gets wiped out. Charge your phone at least up to 60% to decrease the risk of interruption during the process.
Method 1: Using Clockworkmod (CWM) Recovery
At first, we’ll use the CWM recovery to expand the Android mobile storage space.
Downloads
Steps to Increase Internal Storage using Link2SD and CWM
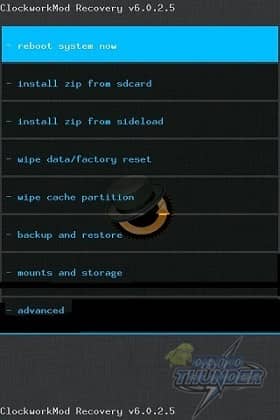
Download and install the Link2SD app. Now switch off your phone until it vibrates. Enter your mobile into CWM recovery mode. Navigate to the advanced option and select it. On the next screen select the partition SD card option.
Next, select the ext size. Note that this size should be less than your memory card size. Select swap size as zero. Wait for few minutes to complete the partitioning SD card process. After successful partitioning of SD card, select +++++go back+++++ and then select reboot system now.
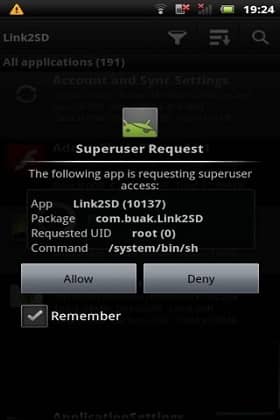
Start your phone. Install the Link2SD app in it. Launch the app and grant Superuser permissions.
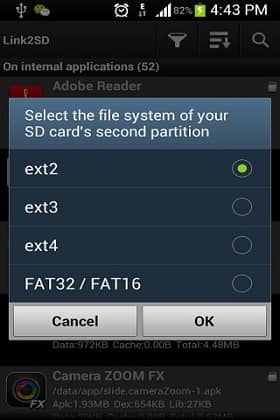
A popup window will appear to choose the file system of your second partition. Select the Ext2 format.
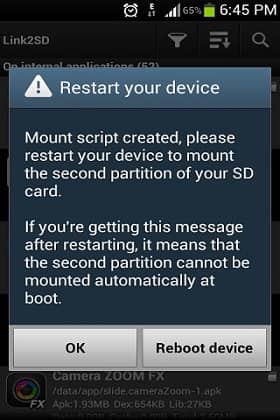
The app will then ask to reboot your device. So reboot.
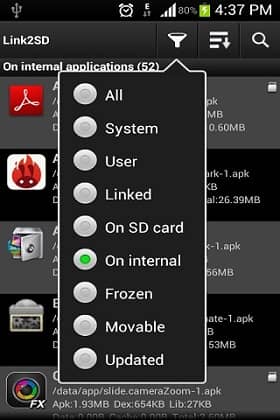
After rebooting, launch the Link2SD app again. On the top, you’ll find the filter option. Click on it & choose on internal. This will show you all the apps present on the internal memory.
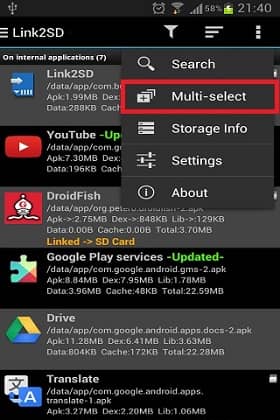
Now click the option key and select a multi-select option. Then select all the apps.
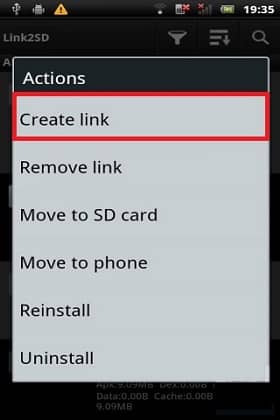
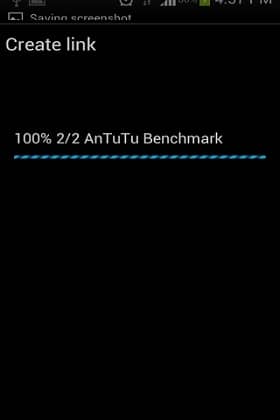
Again click on option and select the Create link option.
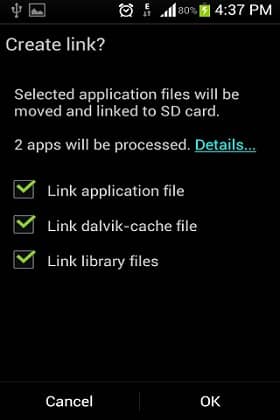
Next tick all the three options i.e. Link application file, Link Dalvik cache file, Link library files. Then ok.
Wait a few minutes to create a link for this partition.
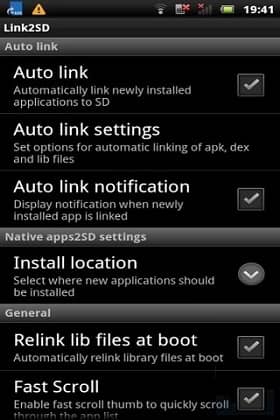
After completing everything as mentioned above click ok. Now to link every new app that you will download to this partition, select options and then auto-link. Every newly downloaded app from the Play store will get saved in this partition.
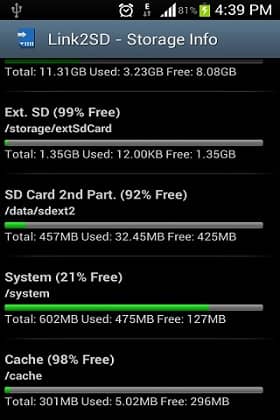
Finally, you’ve successfully increased your phones internal memory. You can see the memory status from link2sd > options > storage info.
Note: Do not remove/replace the memory card as it may corrupt the apps.
Method 2: Using Mini Tool Partition Wizard
Here, we’ll use the Mini Tool Partition software on Windows computer.
Downloads
Mini Tool Partition Wizard Link2SD Android app
Steps to Expand Storage using Mini Tool Partition
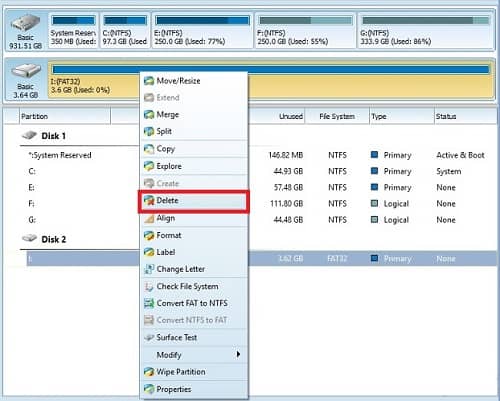
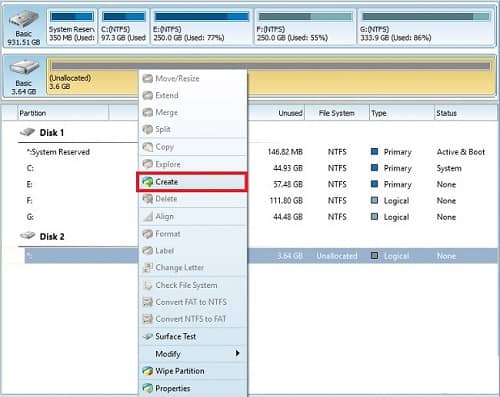
First of all, download and install the Mini Tool Partition Wizard software on your computer. Now remove the memory card from your phone and insert it in the card reader. Connect your memory card reader to the computer. Launch the Mini Tool Partition Wizard software on the computer. It’ll show all your disk drives along with the memory card which you’ve just connected. Now right-click on the memory card and select delete. Note that this will format the SD card completely. Hence, make sure to back up everything before this step.
The memory card will then show unallocated space. Right-click on the memory card showing unallocated space and select create. A popup window will appear.
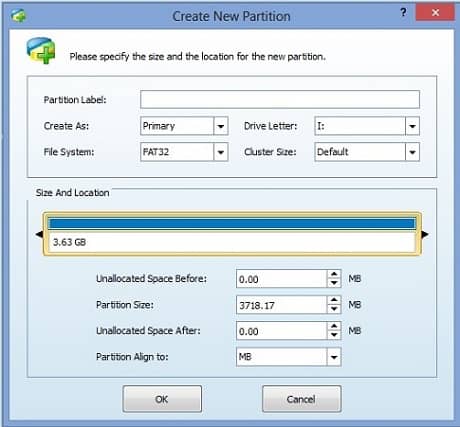
In create as option select primary and in file system select FAT32 (since I use a 4GB memory card here).
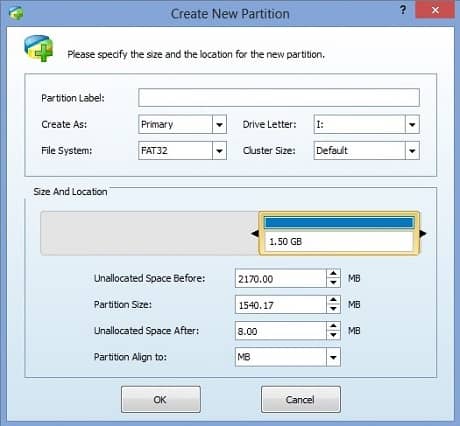
Note: If your memory card size is less than 2GB then select the FAT file system. If your memory card more than 2GB, then you should select the FAT32 file system. Select the partition size of your memory card for storing data and click OK. Here I select 1.5GB.
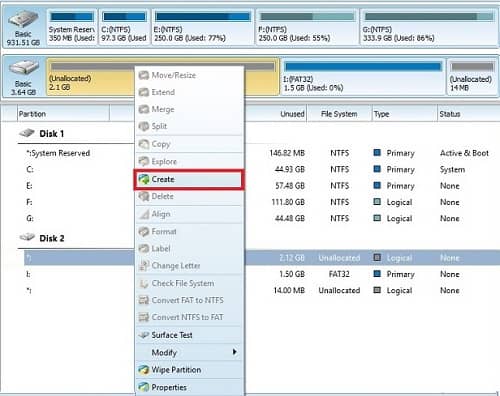
Then select the unallocated space and right-click on it and select Create.
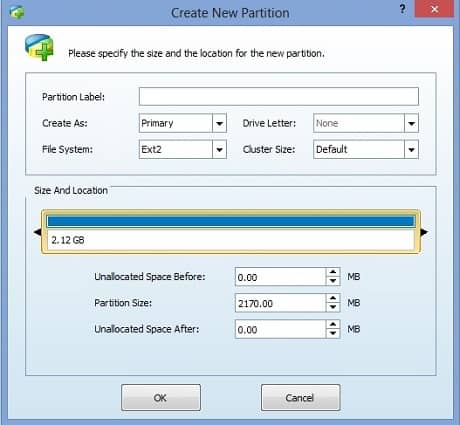
Again in the popup window select primary in creating an option. Choose Ext2 in File system option and click ok.
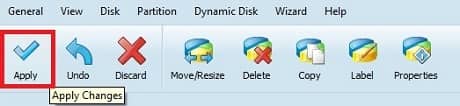
Click on the Apply button present at the top left corner of Mini Tool Partition Wizard.
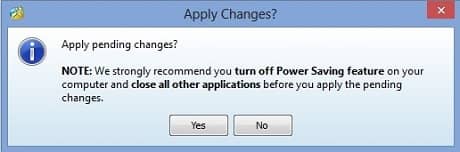
A popup window will appear. Click on the Yes option.
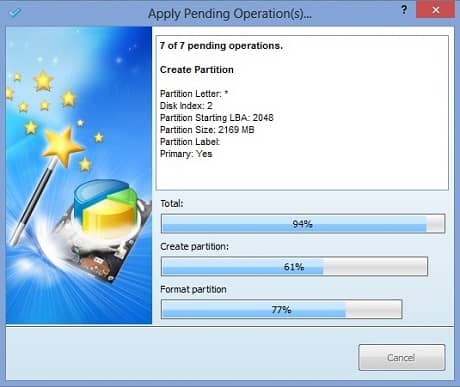
As soon as you click on it the partition process will start. Wait for the process to finish.
After completion of the process, you’ll get a successful message on your PC screen.
Now copy all the data back into the memory card and insert it in your phone. Then restart your phone and follow the steps of method 1. Finally, you have successfully increased your phones internal memory.
Method 3: Using Terminal Emulator App
This method can be performed without using the Link2SD app.
Downloads
Terminal Emulator App
Steps to Expand Internal Storage using Terminal Emulator
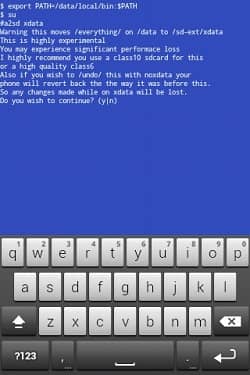
Make a partition of your SD card using Mini Tool Partition Wizard software. Then install Terminal Emulator App in your phone from the link given above. Launch the application. Type this command in it and press enter:
$ su
This will grant Superuser permissions. On the next line type the following command and press enter:
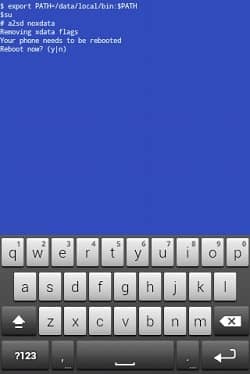
#a2sd xdata
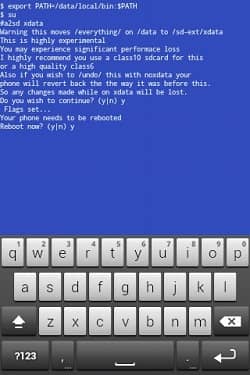
As soon as you press enter, the app will ask you whether to continue with the process or not. So type y as the next command in the app.
Now the app asks to reboot your phone. Again type y as the next command to restart the phone.
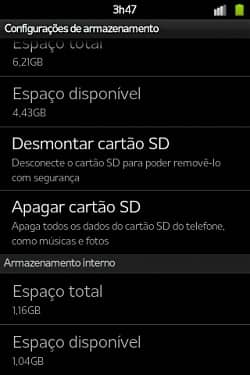
Finally, you have successfully increased your phones internal memory. You may check the same from the Menu > Settings > Storage.
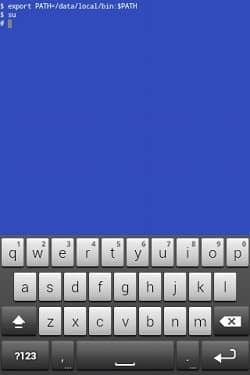
If you wish to undo the process and revert the phone the way it was before, follow these steps: Enter these commands one after another and press enter.
$su
Then type the next command:
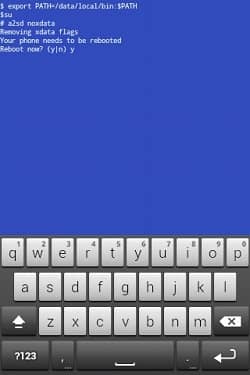
#a2sd noxdata
The app will ask to reboot your phone. So press y as the next command and press enter.
After rebooting the phone will revert to the state it was before. Thus you can increase your device internal memory with the Terminal Emulator app.
Method 4: Using INT2EXT
In this method, we’ll use the INT2EXT file to expand phone storage.
Downloads
INT2EXT4+ (for new ROMs). INT2EXT+ (for older ROMs).
Steps to Expand Phone Memory using INT2EXT
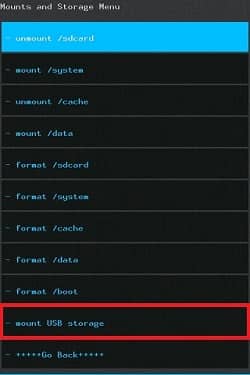
Download the INT2EXT4+ zip file on your computer. Remember not to extract it. Boot your Android phone into CWM recovery mode. Navigate to the Advanced option and select it. On the next screen select the partition SD card option. Next, select the ext size. Note that this size should be less than your memory card size. Select swap size as zero. The partitioning SD card process will begin. Wait for a few minutes to complete it. After successful completion of the process, select ++++go back++++ then select the mount and storage option. On the next screen select the mount USB storage option.
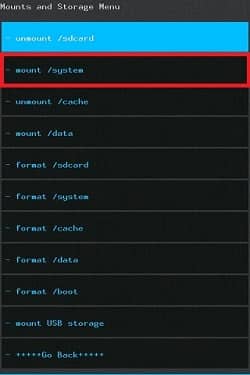
Now connect your phone to PC. Copy the downloaded INT2EXT4+ zip file on your SD card. Navigate to the mount and storage option and this time select the mount/system option.
Return to the main menu and select the install zip from sd card option. On the next screen, select choose from sd card. This will show all the contents present on your memory card. Just navigate to the INT2EXT4+ zip file and select it to start the installation process. Finally, this is how you can increase internal memory. Restart your phone by selecting the reboot system now option.
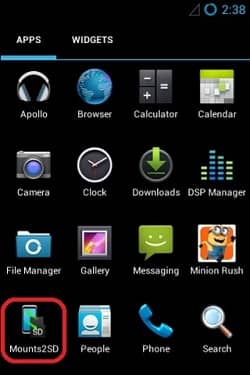
Method 5: Using Mounts2SD app (Requires ROOT)
Here, we’ll use the Mounts2SD application to increase the phone storage space.
Download
Mounts2SD App
Steps to increase internal memory using the Mounts2SD app
Download and install the Mounts2SD app on your phone.
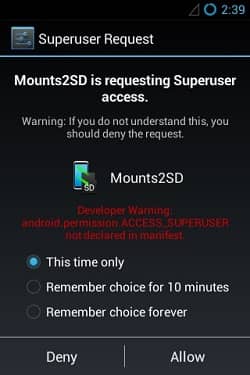
Launch the app and grant Superuser permissions.
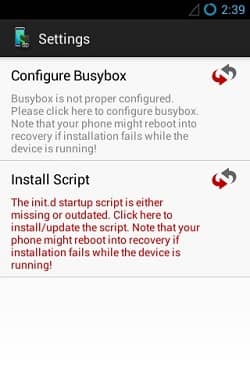
As soon as you all the Superuser request the configuration message will popup.
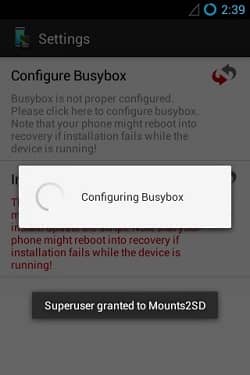
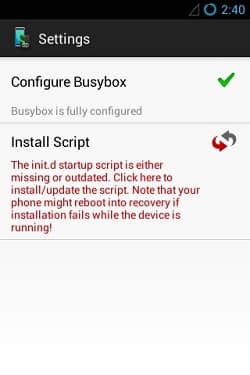
Just click on the Configure Busybox.
Be patient until it completes. A green colored tick mark will confirm the completion.
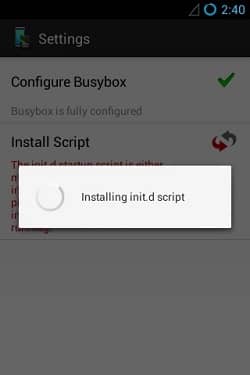
Next click on the Install Script option.
After it completes, you will see the following:
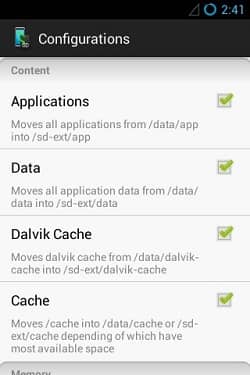
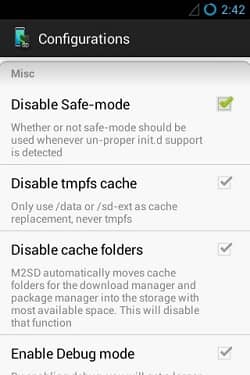
Click on Configure and tick all these options: Applications, Data, Dalvik cache, Cache.
Scroll further down and tick the Disable Safe mode option.
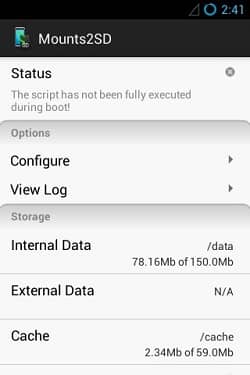
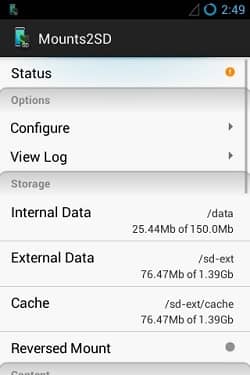
Now exit the app and restart your phone. After rebooting, launch the app again. You’ll see the following:
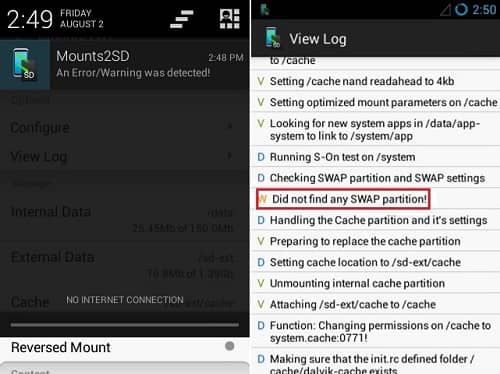
Finally! Your phones internal memory is increased. If you see any kind of error or warning in your notifications due to this app, then don’t panic as it is caused by swap.
Just a boot can blow away the error.
Method 6: Using S2E App
In this method, we’ll use the S2E application to expand the mobile storage space.
Downloads
S2E Android App
Steps to expand Android mobile storage using S2E app
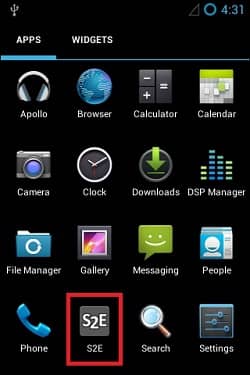
Install the S2E app on your phone from the given link.
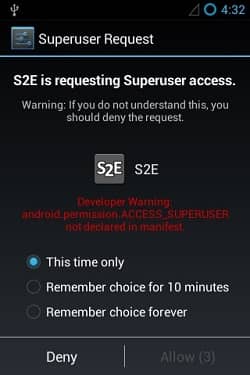
Launch the app and grant Superuser permissions.
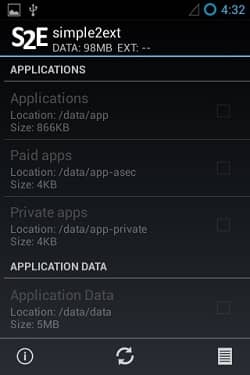
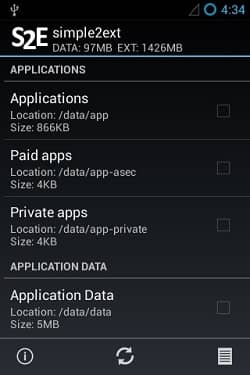
For the first time the App may somewhat look like:
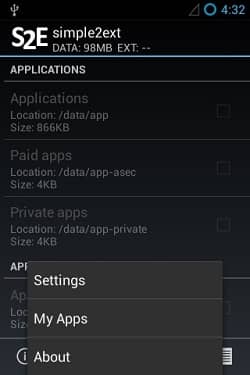
Now press the menu key and enter the settings option.
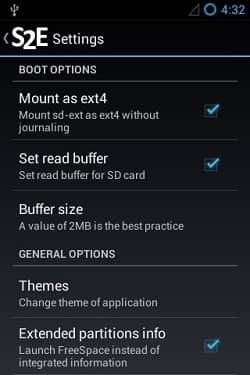
Next tick the first two options: Mount as ext4 & Set read buffer.
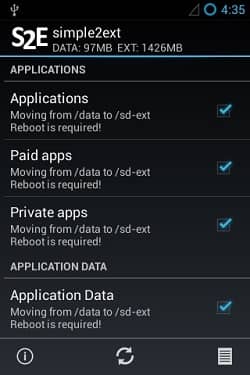
Restart your phone after performing everything as mentioned above. After rebooting, launch the app again. You’ll see the following options:
Tick all those options.
This will move all the apps and their data to the external sd card. Make a final reboot to complete the process.
Conclusion
Finally! You’ve successfully increase internal memory. Just do not remove your external memory card as it may corrupt or damage the apps. If you face any problem while going through the process or have any query then without hesitating comment us. I’ll be glad to help you out. Thank you! Notify me of follow-up comments by email. Notify me of new posts by email.
Δ Need ur help. I have rooted my BQ S37… Now its stuck on boot animation… I tried factory reset but still its not booting… Please advise…. Regards, King pls reply:) ty.